Bloglovin Facebook Instagram Pinterest Twitter YouTube
All Content and Graphics are Copyright to Charlotte Elizabeth © unless otherwise stated otherwise. Powered by Blogger.

Charlotte Elizabeth

  • Home
  • About Us
  • Categories
    • Beauty
    • Fashion
    • Food
    • Health
    • LifeTravel
    • Wedding
  • Work with Us
  • Disclaimer
  • Media Kit


BalanceMe have launched a brand new Social Media competition throughout the rest of July and August. It's pretty simple to enter all you have to do is take a snap of your favourite Balance Me Product on your travels or even at home - make it creative! Share your photos on Facebook, Twitter or Instagram and include @balancemebeauty and either the hashtag #balancemeaway or #balancemehome and each week Balance Me will pick their favourite photo and you could win some Balance Me goodies. SIMPLES!

BalanceMe kindly sent me this Super Toning Body Wash* £9.00 to participate in this competition so I thought I would share my thoughts on this product too. 

This Super Toning Body Wash is invigorating and designed to improve the skin tone, soften and smooth your skin and increase circulation. The ingredients include juniper, bergamot, geranium and lavender to create a delicious body wash that revitalises and awakens your senses. This body wash is perfect for both male and females.


Share
Tweet
Pin
Share
No Comments
It's come that time that I provide you my first official update within my Acne Diaries series since starting my course of treatment. If you read my previous posts you will know that I was prescribed Lymecycline which is an oral antibiotic taken in a tablet form and Benzoyl Peroxide which is a gel based lotion that you apply on your skin. 

Before Treatment

Before I started my treatment my skin was very delicate and without make-up the appearance was very red and inflamed even though there wasn't necessarily any blemishes. My skin had a lot of scar tissue but occasionally when a few blemishes appeared they were very red and had a solid texture as they were more of an under skin blemish. My skin was often sore and the tissue around my jawline was thick and felt clogged.


After 10 Days

You  can see that my skin became very red and sore, the surface of my skin felt sensitive and burnt and it became very uncomfortable to even wash my face. The doctors advised this was from the Benzoyl Peroxide as it effectively is bleach and it had caused irritation to my skin, despite my skin being red and being really dry and tight, the tissue around my jawline did feel less clogged but was still very sensitive. 


After 14 Days

After my visit at the doctors they advised to stop the Benzoyl Peroxide for 5 days and apply a Diprobase Cream which is a bland emollient to repair and add moisture back to my skin. I have stopped using the Benzoyl Peroxide for 5 days now so will be re-starting tomorrow however the doctors have advised to only use this one day on and one day off and in between apply the Diprobase Cream on the off day to start repairing my skin to prevent it becoming as irritated.


Now my skin has repaired itself from the irritation you can see the difference in my skin's appearance, it is a long way from perfect or where I want it to be but you can see my skin is not as red or inflamed and the tissue around my jawline does not feel as congested and feels like it may finally be on the road to repair.


I am starting the Benzoyl Peroxide treatment again tomorrow and I am also returning to the doctors again in around two weeks so I will keep you updated with my progress and hopefully this continues to improve. I do have a long way to go before my skin is healed and the doctors have already advised this could be around 12 - 18 month journey but hopefully this works. 

Anyone who suffers from Acne will understand that it is a personal subject so I really hope these posts are helpful, if there is anything you wish to ask or want to know please feel free to comment and I will response or if you prefer to ask a question more privately you can email me at beau-elle@outlook.com. 


Share
Tweet
Pin
Share
No Comments


I will start by saying I love eye creams. I think it's important to ensure that your eyes are kept looking fresh and nourished - after all as the skin is so delicate it can easily damage. I was super excited to try the Clinique Superdefense SPF 20 Age Defense Eye Cream* link.

Superdefense Age Defense Eye Cream is a rich but delicate eye cream that instantly brightens your eyes by using a sheer yellow tint. I often feel that my eyes feel dark and dull so there isn't anything I love than to brighten my eyes. Clinique Superdefense contains UVA and UBV protection with  a light but effective SPF20. 

Superdefense SPF 20 Age Defense Eye Cream is suitable for all skin types (1,2,3 and 4) and Clinique say this will provide comfortable protection from stress, pollution and dehydration whilst helping to defend the eye area from visible aging. This cream contains a cocktail of ingredients to prevent and protect your skin from being irritated and including a signalling repair technology to help repair your skin, boost your skins natural collagen levels and also acts as a barrier or primer before applying products to your eyes.

This eye cream is suitable for variety of ages from myself being 24 who loves using this product in the morning to get rid of those unwanted bags and to add a shimmer to stop my eyes looking so dull. To my mum; I won't say her age as she will kill me but let's just say over 50 has also been using this and is also loving this. My mum says "I love the consistency of the product and that the thin nib makes the product really easy to apply. I use this product religiously every morning as it instantly brightens my eyes to ensure I am looking my best throughout the day. My eyes feel hydrated and leaves my eyes feeling silky with a beautiful illuminous glow"

Clinique Superdefense SPF 20 Age Defense Eye Cream is available from all Clinique Stockists and Online now for £30.00. 

Will you be wanting to try the Clinique Superdefense SPF 20 Age Defense Eye Cream? Are there any eye creams that you would recommend?


BLOGLOVIN | TWITTER | FACEBOOK | INSTAGRAM


Share
Tweet
Pin
Share
No Comments
For those who have seen my other posts in the Acne Diary series you will know I have a skin struggle, I have been trying different things for years and it has been getting on top of me. As I am planning a wedding, I have decided enough is enough as I am done trying different remedies that don't work so I plucked up the courage and went to the doctors to ask for a more permanent solution. 


There are many types of Acne so don't ever try medication or gel/liquids without seeing your doctor as you don't want to get one that is going to make things worse. My doctor have advised that I have a combination of Cystic Acne and inflamed acne. 

Cystic Acne is large bumps that are under the skin, they are filled with a pus like fluid underneath the skin but you won't be able to squeeze it out and they can be quite painful. These Cysts can take a while to go away and can cause scarring as they are deep in the skin. I tend to get these along my jawline near my glands, they tend to come back as the bacteria is still in the tissue in under your skin. The worst thing you can do is squeeze these, don't ever think about it - as hard as it can be as you can spread the bacteria which can cause more Cysts.

Inflamed Acne is when your pores clog, so this may have started as a whitehead or black head and it can get infected or irritated and becomes inflamed. The appearance is red and the skin around the acne is swollen and can also be painful. This type of acne is not filled with pus usually but can should this get infected. Again don't squeeze these as more than likely it will scar or the bacteria will spread and will cause a furthr breakout.


I was prescribed two treatments to try, one is an tablet antibiotic and another is a gel fluid to try for the next 4 weeks, the doctors have only given me a month prescription for now as they want to see how I get on with them. Depending on the results if things are starting to improve then they may make the decision to keep me on antibiotics for between 12 and 18 months or they may be referring me to a dermatologist to complete further tests and possibly a more intense treatment. 


Lymecycline capsules is used to treat and reduce acne by reducing the growth of bacteria in and under the skin. You have to take one capsule every day around the same time, they recommend you taking it in the mornings but it is personal preference. This medicine usually takes around 8 weeks to start having a noticeable results.


Epiduo is a cream-gel formula which is a branded name for Benzoyl Peroxide. Benzoyl Peroxide is available as a cream or a gel and is used either once or twice a day depending on doctors recommendations. It works best when applied around 20 minutes after cleansing or washing your face and it should be used sparingly as it too much of this product can irritate your skin.

As Benzoyl Peroxide can have a bleaching effect you need to be careful on bed linen, hair and clothes. It also makes your skin more sensitive to sunlight so you may need to avoid natural sun and UV lighting and wear a higher protection sun cream when in contact with the sun. This treatment usually takes around 6 weeks to have noticeable results. 


Full information on Acne and Acne treatment can be found at NHS which is the website the doctors have recommended me reading so I understand my condition in more depth to ensure I can control and treat it the best I can. 

I hold my hands up, I did get a little emotional when speaking to the doctors. Acne can be quite a personal and emotional subject, for me personally it has effected me in so many different ways and it has effected my confidence and personal life - Even when I am on holiday I am unable to wear a bikini without wearing a kimono or shawl to cover the Acne on my back or even at social or public events I am unable to wear a top that reveals any part of my back. I am not saying this for sympathy but for anyone else who suffers from Acne, I know how you feel as I have felt embarrassed, I have had a lack of confidence and I have felt fed up as I had tried practically everything but I am hoping this new skin journey is what I need to improve my skin and to get my confidence back and I really hope these posts could help you too. 

I would love to know if you find these posts are helpful and if you would like me to cover anything.


BLOGLOVIN | TWITTER | FACEBOOK | INSTAGRAM


Share
Tweet
Pin
Share
No Comments


I have been on the search for a good primer for like, well forever! I grew out of the POREfessional and the Baby Skin primers as I found them too silicone-y and I felt like my make-up was sliding off my face. I had recently heard about Estee Lauder's Matte Perfecting Primer Link and I was eager to try it. 

I managed to get my hands on some and I have been using this for around a week now and I love it, the texture as it feels like a milky lotion without a silicone like texture. The primer is oil and fragrance free and has been dermatologist textured so it is great for those with oily-combination skin like mine. The ingredients include Green Tea which is great for calming your skin and Vitamin E to rebalance your skin. 

This product works best when used on a bare face before make-up application but Estee Lauder say that you can use it in between your moisturiser and make-up. They also say that this primer has a targeted formula that controls oil and reduces shine so make-up looks smooth and flawless whilst minimising the look of pores to create an even canvas.

The primer is ideal for Normal, Combination and Oily Skin. I think the price of £23.50 for 30ml is a little on the expensive side compared to other primers but so far this is my favourite as it really is a lightweight formula that helps my make-up stay in place during the day. I use this every day as I find it makes my make-up application so much easier and smoother, it makes my skin feel amazing. Despite the price, I would definitely consider buying this as I really love the results on my skin.

Are there any primers that you are loving? Would you try the Estee Lauder Matte Perfecting Primer?


BLOGLOVIN | TWITTER | FACEBOOK | INSTAGRAM


Share
Tweet
Pin
Share
1 Comments
For those who don't know I am getting married next October, and I am also a secret crafter. I absolutely love making unique things for people as gifts or just for me for no reason what so ever. I wanted to do something extra special to ask my bridal party to be there on my special day. I am a sucker for Pinterest mood boards and I came across some beautiful boxes to ask your girls/guys to be your bridesmaids/bridesmans, having looked on Etsy and eBay I found that to buy these they were so expensive and they were not really personal so I decided to make them. 

So what you will need:


Square Boxes from Paperchase, £3.25 each (Come in a variety of colours)


Delicate paper cut outs from The Range, £3.99


Tissue Paper from Paperchase, £1.99


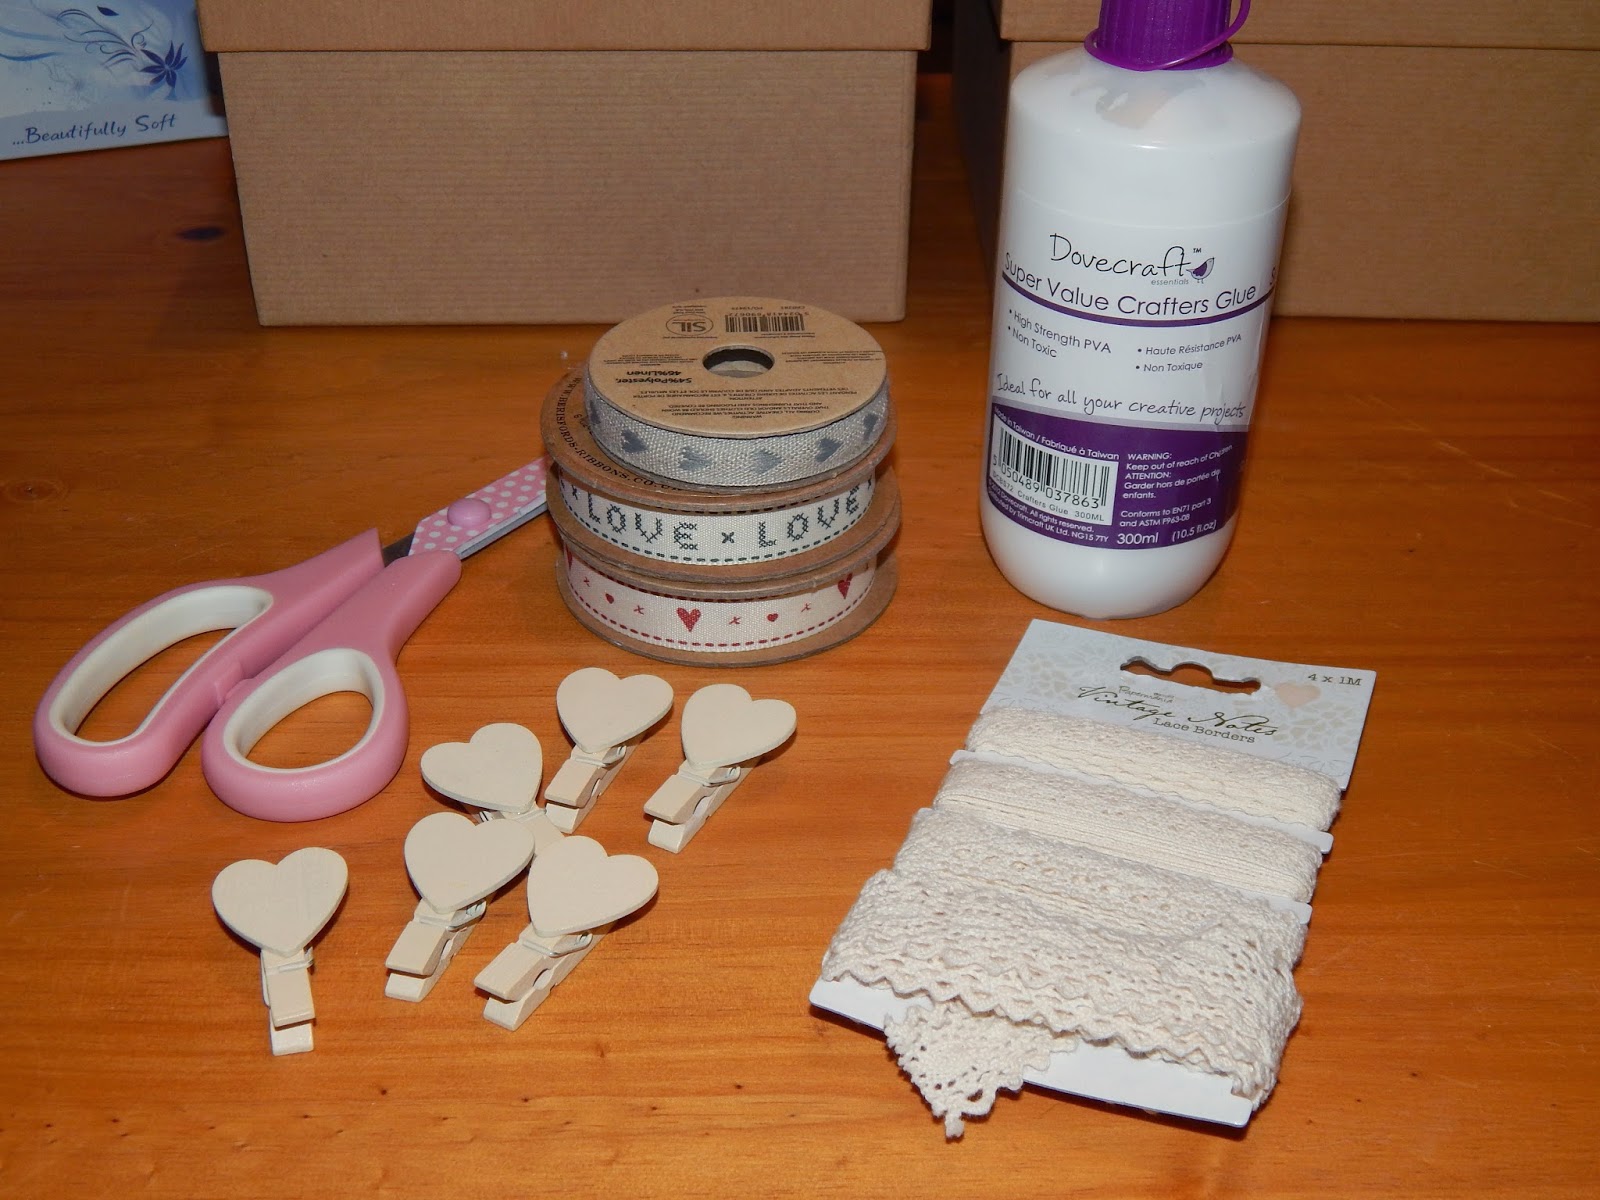
Craft Scissors, Craft Lace, Crafters Glue, Craft Ribbon and Wooden Heart Pegs all The Range between £2-£10 each. 


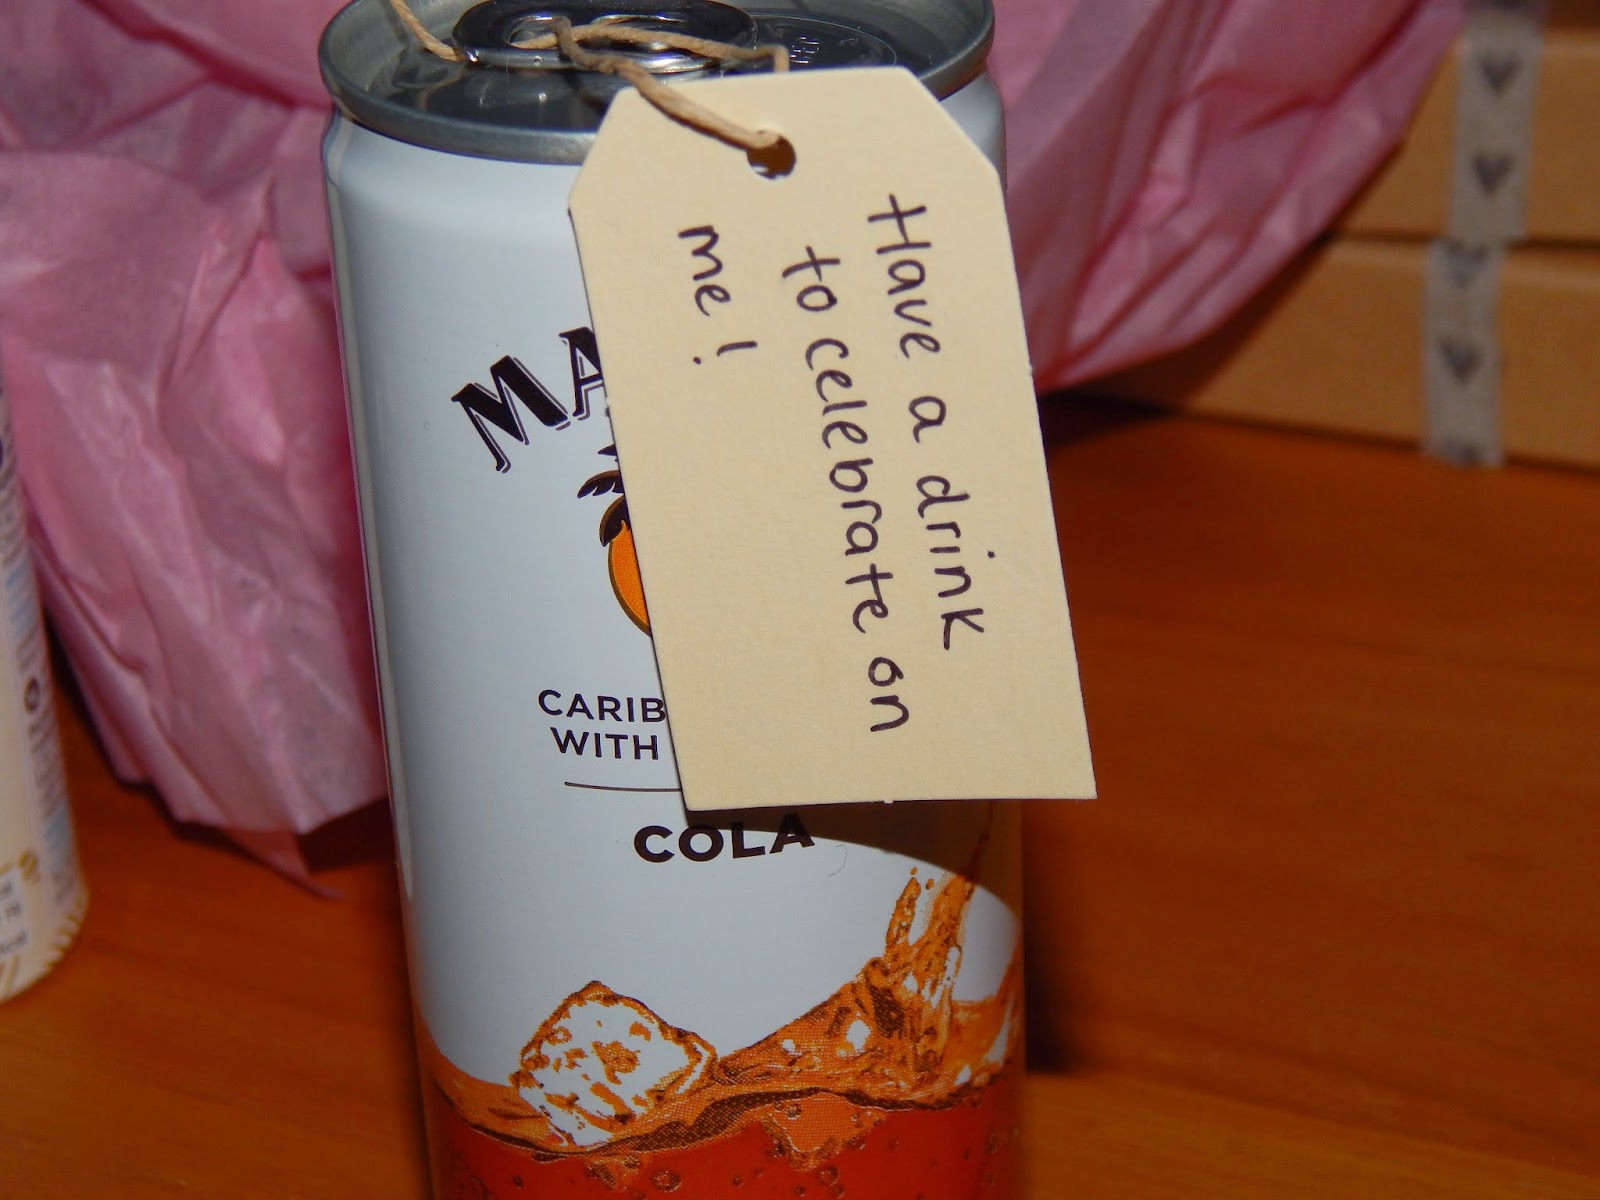
Little gifts to add to the box - I picked up a drink for each box, a tube of chocolates, pocket tissues, lip butter and a pamper treat.


For the decoration on the front of the box I apply the lace paper heart to the centre of each box applied with a thin layer of crafts glue. I also applied two ribbons across the box to add a bit more decoration, one was vertical and one was horizontal and both applied with craft glue. 


I repeated this process for all three boxes as I chose for these boxes to be the same - of course you can do whatever you like on your boxes as it is personal preferance but I thought I would show you step by step of what I did for my girls :)


For the inside of the box I scrunched up some tissue paper, I chose pink and I layered it in the box to create a base for the products to sit on. It did irritate me that the inside of the boxes were different colours however I forgot to buy paint to cover the inside so I just decided to leave them as they were.


I attached small luggage labels with a cute message on each one and put all of the products in the box. 


I had previously ordered these cute cards from Etsy - Link to add a final touch to the boxes. I thought these were super cute and all come on a shimmered card. 


I then added a white shimmer to the wooden hearts using a paint pad from The Range. And used the pegs to seal the envelope - mainly because I am fussy and it annoys me if the envelope was to be sealed properly haha.


For the information cards I wrote out different paragraphs on Microsoft Word and printed a copy of these for each box. I taken inspiration from Pinterest as to what should be on the information card's but the content was hand written and tailored to suit my requirements.


I cut the text out but in different sizes so I could layer them (you will see what I mean below) and I stuck these to brown card, I just picked up some blank brown cards from The Range to do this.


After laying them all together I added a small piece of lace ribbon on each buddle to add the finishing touches. 


I added the card from earlier with this and clipped them all together with the heart peg clip.


I then added some more tissue paper on top of the products to stop them moving around - especially as one was being shipped abroad I didn't want anything to get damaged!


I finished by wrapping the boxes in brown parcel paper which you can pick up from any post office or stationary store and I added a personalised message on a larger luggage tag to ensure I give the right box to the right person and I also added these cute Made with Love tags which I picked up from Sainsburys (they are for Kilner Jam Jars I believe but it does the trick!) And Voila! my boxes were ready to be handed out :) I still have a couple of boxes to make which are different to these but with a similar style so I will be sharing these within the near future.

I hope you liked this post as much as I enjoyed writing it, I hope to be posting more shortly throughout the planning of my wedding and other little DIY projects that I will have. I would love to hear your comments/thoughts on this new series and if there is anything you would like me to answer or post about. 


BLOGLOVIN | TWITTER | FACEBOOK | INSTAGRAM

Share
Tweet
Pin
Share
9 Comments
Newer Posts
Older Posts

About Me


Charlotte Elizabeth

Charlotte Elizabeth is an online blog, bringing you a dose of luxury beauty and style, life and everything in between.

For all enquiries, please email charlotteelizabethblog@outlook.com – we’d love to hear from you!

Follow


Follow Us

  • Bloglovin'
  • Facebook
  • Instagram
  • Pinterest
  • Twitter
  • YouTube

Trending

  • Liz Earle Cleanse & Polish Limited Edition
  • How to get Instagram Famous
  • Getting Married Abroad: Our Wedding
  • Wedding: My Favourite Planners
  • Wedding: DIY Bridesmaid Boxes

Labels

Acne Beauty Endometriosis Fashion Featured Girl Talk Lifestyle PCOS Review Skincare Tips Travel Wedding

recent posts

SONGS I LOVE

Blog Archive

  • ►  2018 (5)
    • ►  January (5)
  • ►  2017 (9)
    • ►  October (1)
    • ►  August (4)
    • ►  February (1)
    • ►  January (3)
  • ►  2016 (37)
    • ►  December (4)
    • ►  October (3)
    • ►  September (3)
    • ►  August (2)
    • ►  May (1)
    • ►  April (6)
    • ►  March (1)
    • ►  February (6)
    • ►  January (11)
  • ►  2015 (66)
    • ►  December (9)
    • ►  November (15)
    • ►  October (7)
    • ►  September (8)
    • ►  July (12)
    • ►  June (10)
    • ►  May (2)
    • ►  March (1)
    • ►  February (1)
    • ►  January (1)
  • ▼  2014 (45)
    • ►  December (1)
    • ►  November (5)
    • ►  September (2)
    • ►  August (11)
    • ▼  July (8)
      • BalanceMe Beauty Voyage
      • The Acne Diaries: Two Week Update
      • Clinique Superdefense Age Defense Eye Cream
      • The Acne Diaries: My New Journey
      • Estee Lauder Matte Perfecting Primer
      • Wedding: DIY Bridesmaid Boxes
      • Eyeko Skinny Liquid Eyeliner
      • Liz Earle Cleanse & Polish Limited Edition
    • ►  June (5)
    • ►  May (8)
    • ►  April (5)
Facebook Twitter Instagram Pinterest Bloglovin

Created with by BeautyTemplates